Archive | August, 2011

School Spirit

27 Aug

The 2011-2012 school year is officially in full swing! I had a successful first week back to school, so for this post I’m featuring the cake that I made for my grade level’s teachers during pre-planning. It was a simple design, nothing extraordinary. I knew that if I picked something too extravagant during the week before school started I’d just be too busy to do a good job of it.

I started with mixing together some fondant in our school colors: green and yellow. I mixed two different shades of green because I needed 3 colors for this design.

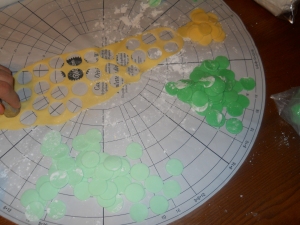
The cake itself was a simple yellow cake with my sister’s new buttercream icing recipe. YUM. I didn’t want to completely cover it in fondant, but I needed some fondant for the outer design. My husband helped me cut out lots of polka dots. The larger end of my cupcake icing tip was just the perfect size.

Once they were all cut, I just had to attach them to the sides of the cake in a pattern. Our school mascot is a rocket, so being cheesy as I sometimes am, I had to work that into the message on top.

I think the top turned out looking a little Plain Jane compared to all of the colors on the side. I’ll have to work on the top more next time I made the sides of the cake so colorful. 🙂

To anyone working in a school or anyone who has school aged children, I hope this is a great year for you! 😀

Up Next: Can’t decide. Maybe a new twist on cheesecake pops? Maybe mocha icing? Maybe something else entirely?

Random Thought of the Day: Next week is a big one! My birthday, a 3 day weekend because of Labor Day, and college football starting. Should be fun times. 🙂

Goat Cheese + Chocolate? Yes, please!

20 Aug

A few months ago I saw an episode of “Throwdown” where Bobby Flay had to challenge a couple of sisters on their brownies. Being a huge fan of brownies, the episode really caught my attention! The sisters had a little dessert shop and they sold several types of brownies, but the one they focused on for the show was their signature recipe: brownies with a goat cheese swirl on top. I was a little skeptical, but the judges approved. I immediately thought of a friend of mine who always claims that she’ll eat anything if it has enough goat cheese on top. So I kept this idea in the back of my mind to make for her later.

Well, later finally  happened. 🙂 I searched online and I didn’t find the exact recipe from the Throwdown episode, but I did find a recipe that looked rather promising. I was actually surprised at how easy it was too! The finished product looked very sophisticated for a dish that’s so easy to make. The full recipe can be found here.

The swirl is made by mixing together goat cheese, powdered sugar, flour, and an egg.

The brownie part is a very fudgy recipe. Just the kind I like. 🙂 But if you are a cakey type of brownie person, this might not be your favorite. I liked that it also had chocolate chips mixed in, and they added a nice texture. Start by whisking together some cocoa, sugar, powdered sugar, sea salt, chocolate chips, and flour. Then add some eggs, water, oil, and a little extract. The recipe calls for chocolate extract, but I didn’t have any so I just used vanilla instead.

This is what it will look like after you’ve dumped half of the brownie mixture into the pan, poured the swirl mixture over that, and then spooned the rest of the brownie batter on top. I also used a rubber spatula to give it a quick swirl. Don’t swirl it too much, though. You don’t want to completely mix the colors together.

And this is what is looks like after coming out of the oven.

Pretty tasty looking, right?

Hello, gorgeous. 🙂

These brownies really were just that simple. I’d make them again in a heartbeat. They only take a few more minutes than a box mix. Give them a try.

Up Next: Back to school!

Random Thought of the Day: I’ve been making smoothies pretty often in the last couple of weeks. I guess I got on a smoothie kick or something. What flavors should I try? What is your favorite?

Summer Blockbusters

13 Aug

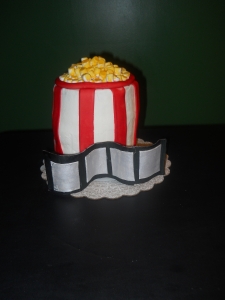
There are so many things I like about summer time. A vacation from school, an excuse to eat ice cream, going out to the beach, and watching a good movie. With summertime so quickly drawing to a close, I had to be sure to make this cake that I’d been thinking about for a while now. The end product didn’t turn out quite as grand as I’d had in mind. But it was a fun cake to make and I learned some new tricks in the process. Maybe next summer I’ll make it again and it will turn out just like I wanted it to.

I started with three layers of strawberry cake. I wanted a nice, tall cake for this project.

After icing it with buttercream, I needed some fondant stripes. Red fondant stripes. Although red is my favorite color, it’s one of my least favorite colors to work with when it comes to cake. In order to achieve a true red color, a huge amount of red coloring must be kneaded into the fondant which is not only annoying, but tiring. This time, I decided to try some edible red spray instead. Turned out pretty well, and it took all of 10 seconds to achieve the color I was looking for. I was a happy camper 🙂


I piled some mini-marshmallows on top and brushed them with yellow food coloring. And then I had…..a movie’s best friend!

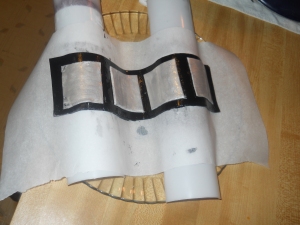
In the meantime I had made a “filmstrip” from some black and silver fondant. I let it dry long enough for it to stand up on its own.


I think I have some room for improvement with this cake design, but overall it was kind of cute. For some reason, cakes that look like other food are always fun for me. 🙂 This cake makes me want to ask…..what was your favorite movie that you saw this summer? I’m pretty certain I can guess Stacia’s answer. 😉 Leave a comment to let me know which summer flick I HAVE to see.

Next Up: It’s a surprise. I can’t post it here yet in case she reads this before the surprise happens. But it’s an interesting twist on a chocolate classic. Is that enough to make you want to read the next post? 🙂

Random Thought of the Day: The Next Food  Network Star finale is tomorrow night!  From the very first episode of this season, I picked Jeff as the winner. He’s in the top 3, so I can’t wait to see if my prediction was correct!

Cakepops are so last school year

6 Aug

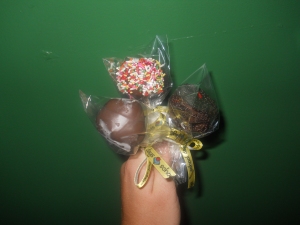
Cakepops are delicious. No doubt about it. But they are sooo last school year. To kick off the new school  year, I bring to you the superior version of the treat. Not just cakepops, but cheesecake pops. I’m not sure that a better treat-on-a-stick exists. The only problem with the cheesecake pops was that even though they sound fairly simple, they were really a pain to make. Well I won’t say that it was the only problem. There’s always the problem that in a very short time period they’re all gone and more cakepops are needed. But that’s a problem I can handle. 🙂

I started by making a cheesecake from scratch, just for the purpose of making the cheesecake pops. If you want to try making these without doing all of that work, you can also just buy a ready made cheesecake and use that. Of course, the better the cheesecake the better the pops will be. So make you sure bake/ buy a good quality recipe.

Once you have a cheesecake, that’s when it gets messy.

Very messy.

This messy.

The cheesecake is not as easy to shape as the cake/icing mixture that is used for traditional cakepops. I tried using a tablespoon at first, but found that the cheesecake didn’t slide out of it very well. So then I started using my mini ice cream scoop. That worked better, but was still a little challenging. I scooped out the cheesecake onto some parchment paper and then rolled each one into some graham cracker crumbs.
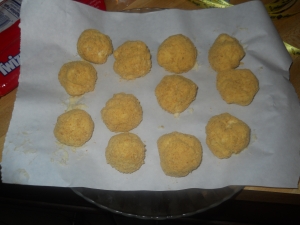
Then I put them in the freezer to let them firm up. If they aren’t firm when dipped into the chocolate they will fall right off of the stick. And we certainly don’t want that. I found that these had to stay in the freezer an entire hour before they were ready to dip. The traditional cakepops only take about 15 minutes, so I was surprised that these took so much longer. But when I tried to dip them at the 30 minute mark, in went the cheesecake pop and out came only the stick. My first cheesecake pop casualty. Once I allowed them more freezing time, things went a little smoother.

A little. For some reason, the graham cracker crumbs were still mixing all in with the chocolate while I was dipping. I thought they would freeze well enough to not come off. I guess they didn’t stick to the cheesecake as well as I’d thought. While dipping the pops, it’s important to stir the chocolate every few minutes to make sure it stays smooth. Every time I stopped to stir the chocolate, I noticed more and more graham cracker crumbs in it. It made the dipped pops look all lumpy, which I didn’t like. But once I added sprinkles or more crumbs on top, it looked a little better. I liked the crumb coating the best. I thought it was a nice little hint that there was a very special kind of pop waiting inside. 🙂 And it tasted pretty good too.

This was quite a process. When I make traditional cakepops, things move pretty quickly once everything is shaped and ready to be put on a stick and dipped in chocolate.  With these cheesecake versions, it took an hour and a half  just to get them all on a stick and dipped. Yikes. So I can’t say that I’m planning on making these again anytime soon. But they were very good. So I’ll try not to let a new school year roll around before I make another batch.
 

Up Next: I think it will be a cake that looks like  other food. Am I ever going to get tired of that? Maybe not.

Random Thought of the Day: Has anyone ever tried to make homemade soft pretzels?  Like the kind you can buy at the mall? I tried some last night but they came out burned to a crisp. Going to give it another try tonight I think. Any tips?